Our News
Lens mapping
Lens mapping
All-sky cameras use lenses with a very wide field of view, usually fisheye lenses, which have a marked distortion of the image.
While not strictly necessary to use an all-sky camera it's good to know the mapping of the pixels in the image to locations in the sky. This is essential if you want to plot other things on the image (like the location of aircraft and their navigation lights), or the location of the object being imaged. For regular lenses this mapping is straightforward, a so-called rectilinear transformation. But fisheye lenses, as we use in all-sky cameras, are different: there are four known mapping functions, and one of them has variants. We need to know which one is used (occasionally the manufacturer will specify it: Fujinon say their lenses use f-theta mapping, which means equidistant mapping).
A nice description of these various mapping functions, and examples of the lenses which use them, is available on the Wikipedia page: https://en.wikipedia.org/wiki/Fisheye_lens
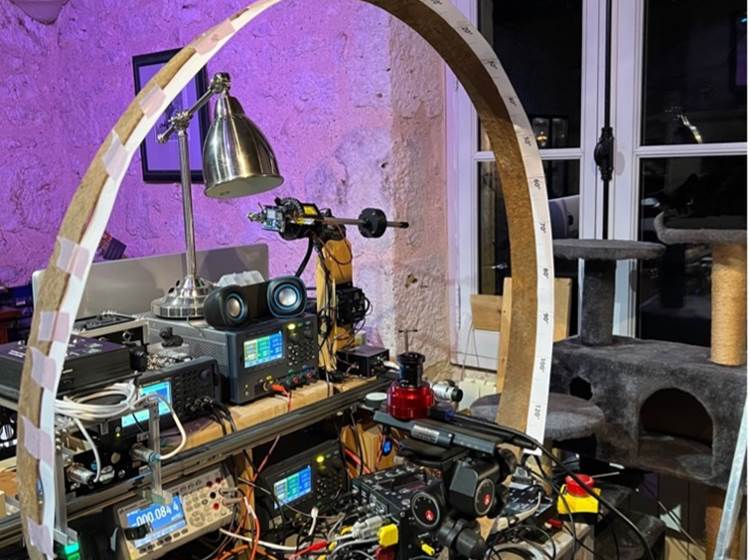
To do this mapping we need to know the linear distance from the image centre as a function of the angle away from the optical axis. The best way is to make an image of the night sky and measure the position of stars. But characteristically, when our new lens arrived the weather was inclement – clouds and rain. So, we decided to set up a rather Heath Robinson jig based on an old wine barrel hoop we found in the barn.
We stood the hoop vertically and attached a paper strip with markings for each 10° of elevation. The camera must be in the centre of this contraption. Luckily we have a 3 axis geared mount and a controllable eccentric platform, so combined with manual positioning of the tripod (and its height) we have the necessary 6 degrees of freedom to align the lens with the marked angle scale.The camera is the small red thing at the centre of the hoop, which is partly suspended from the ceiling because it sagged. It's so big to ensure the image is in focus. A rigid hoop would have been better, but it's what we had available.
Well this worked to the extent that we could tell our new Yumiki lens uses the Equisolid projection, like out old Zuiko 8mm Fisheye, in the days we had an Olympus E3 camera. As the Wikipedia page points out there are some lenses which vary the two parameters in this projection, which in the simple case have value 2. And our Yumiki is one of those.
To make further progress we had to wait for clear skies and the chance to make real photos.
In fact we decided to characterise all four lenses we have available: the Yumiki, the lens from the old Oculus system (commonly referred to as an Arecont lens) and 2 different lenses supplied with the various ZWO cameras we have.
So eventually we had the chance to set up the new ZWO camera with each of our 4 lenses, on a simple tripod in the filed next to the observatory. Not ideal, but it was enough for the purpose. Here we can show 4 images, one with each lens. But we also have extensive spreadsheets with the analysis of the mapping for each one; it's too much for this blog, but if you're interested, get in touch.
So, here they are (remember they are all made with the same ASI676MC camera, on the same tripod in the same place, on the same night:
First the Arecont (Oculus) lens. This is a pretty good lens, with details right to the horizon. It has equidistant mapping, also called f-theta.
---
Then the ZWO 2.1mm lens. It's not a very good lens: It has very distorted stars in the upper left quadrant (but less elsewhere, which is a bit odd). It also doesn't reach the horizon (look at the Ursa Major at the top, which is missing a few stars), and it has a soft border. It also appears to have an equidistant, or f-theta, mapping.
---
Next up is the ZWO 2.5mm lens. It's not bad and fills the sensor. It has a slightly soft edge and doesn't reach the horizon. It also has equidistant, or f-theta, mapping.
---
Finally, we have the Yumiki 2.5mm lens that I selected for my All-sky camera. It reaches to the horizon and slightly beyond, and, by virtue of its modified Equisolid mapping, it privileges the central part of the sky vault with respect to the low elevation angles.
New All-Sky Camera, Design Starts
New all-sky camera: Starting the design
The first step in designing this all-sky camera system is to decide on the combination of camera and lens.
Camera
My key requirements for the camera were:
· A colour camera: because my last experience of a bright aurora here caught it only in black-and -white. Aurorae may not be very common, but I don't want to miss the opportunity if it happens.
· Ideally a square frame, since the edges are wasted with a circular field of view
· Higher quantum efficiency: my Oculus peaked at 50% and was generally about 30%
· Higher resolution: the Oculus had a frame size of 1392x1040 pixels, with a pixel size of 4.65 µm
· Lower noise: my Oculus had a read noise of about 7 – 10 electrons
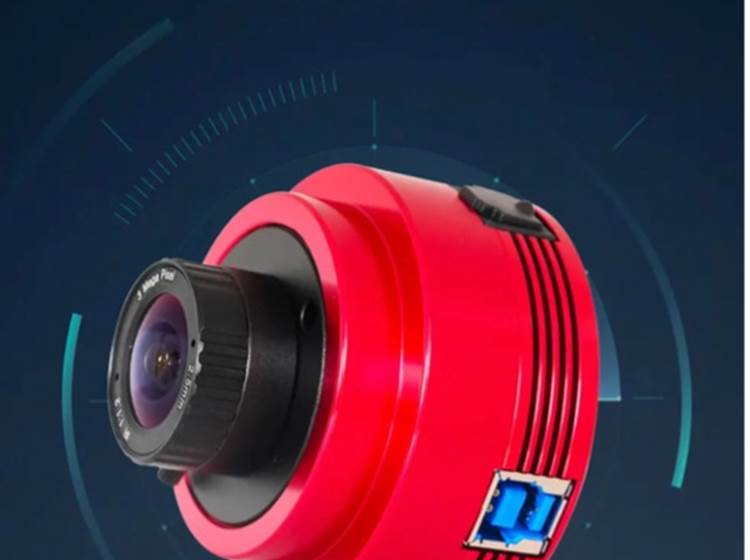
I reviewed the offerings of a few manufacturers and quickly concluded that ZWO's range had the flexibility I needed, and ultimately decided on a camera called the ASI676MC (these names are not very evocative, being based on the identification of the Sony imaging chip inside). It has a colour imaging chip with a square format and meets my other requirements. Here's part of ZWO's page on the subject:
The selection of this camera defined the size of the imaging chip: 7.1mm x 7.1mm, a format referred to as 1/1.6"" – I could write a whole article on this alone, but it is a measure of the diagonal size of the sensor.
It is a 12Mpixel camera with 3552x3552 pixels frame – way more than the 1392x1040 pixels in the older camera.
Lens
Knowing the dimensions of the sensor (crucially the 7.1mm x 7.1mm size) meant I had to find a lens which would offer an image circle within this size and covering at least 180°. Also, it had to have a CS mount to match the camera interface.
Quite a lot of searching later it seemed I found the right lens: a ""Yumiki"" 2.5mm lens with a 6.4 mm image circle. This is a reasonable match to the 7.1mm square frame of the camera, but with such an over-abundance of pixels I can afford to crop the surplus 0.35 mm on each side. Interestingly it advertises the field diameter as 190°, rather than 180°. We will see how that works out, but as I already mentioned, there are parts of our horizon below the horizontal.
This lens only seems to be available on Ali-Express. I've never used that before (though my wife is an avid customer), so it is with a bit of trepidation that I'm taking the plunge.
3D Modelling
Since I knew I would be designing the overall system in my preferred 3D software (Fusion-360) it was clear I had better start by creating models of the camera and lens, and for this I used the drawings available on the manufacturer's websites. Here's what I created.
Enclosure
Having decided the optics the next step is to design the enclosure which will house all the stuff. My first instinct is to look for a commercial enclosure designed for outdoor use, rather than try to build something myself. There are very many vendors of such enclosures, but by habit I'm drawn to Hammond, a Canadian manufacturer, since I have used many of their products before and have always been satisfied. Hammond provide 3D models of all their products, and this quickly enabled me to narrow down the size of enclosure I needed.
I started with smaller, square format, enclosures, but Fusion-360 quickly showed I needed something bigger. In the end I chose the 1554QAGY family, 140x140mm square and 90mm deep. See https://www.hammfg.com/electronics/small-case/plastic/1554
An important note here: without reading carefully enough I ordered the 1554QAGY model, in ABS. It turns out this is not UV stabilized and so can degrade when used outdoors in strong sunlight. I should have chosen the 1554QA2GY, made from Polycarbonate, which is stabilized against UV.
As I always say: read the specifications! (but I missed an important bit this time).
I will have to investigate applying a UV-protection film. If that doesn't work out, I might end up ordering the polycarbonate version and switching to that. That's for the future though.
#caméra, #all-sky, #tout-ciel, #Starlight_Xpress_Oculus
New All-Sky Camera
For many years we have had a Starlight Xpress Oculus all-sky camera at the observatory – using it for everything from checking the cloud conditions to looking for aurora and meteors. We also used it to make time-lapse movies of the movement of the sky. Its lens has a 180° field of view, so enough to cover our skies right down to the horizon (because here at our hill-top observatory we do have a really good horizon and, in some sectors, it is even below the horizontal).
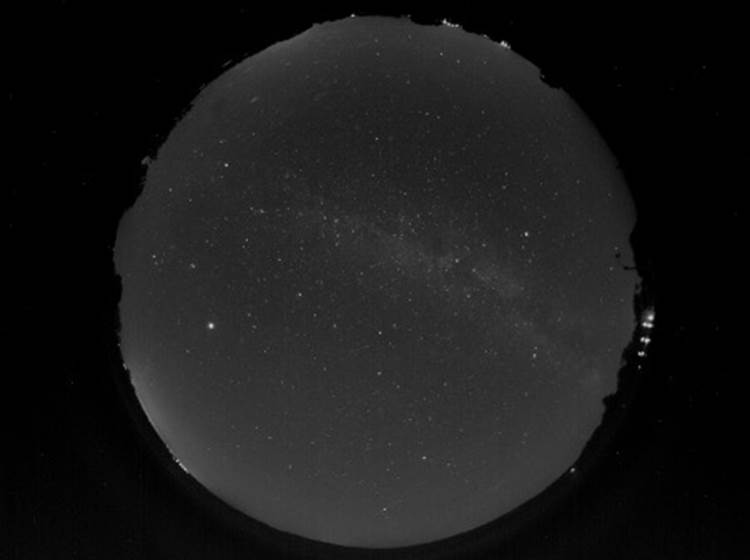
Here is an example of one of the 30-second exposures that we make all night, taken at 23:58 (just before midnight) on 6-Oct-2023. It's a black-and-white camera so there are no colours. We can see the circular horizon. Since the camera is mounted on a 4m mast there are no local obstructions. North is at the top, and the lights of our house, to the west of the observatory, are on the right of the image. A few lights to the north (at the top) are from our local village. The Milky Way is plainly visible and it's easy to spot well-known constellations.
Unfortunately, after more than 8 years, our system has finally died. The camera built into it has failed and it is no longer in production so can't be replaced. We have searched the second-hand market in vain, and the best we could hope is that the manufacturer can repair it. They say they probably can. But the cost remains unknown.
The image above was made with a general-purpose imaging software, designed to allow Starlight Xpress cameras to be used on a Mac. We happily used it for many years, but about 9 months ago we learned of a software dedicated to all-sky imaging and built onto the INDI platform (which we had started using a few months before for our main imaging system).
It's called INDI Allsky and is rapidly growing in its capabilities. It's primarily intended to run on a Raspberry Pi, which is perfect for us – we have many of these little computers in the observatory. One of the many advantages of this system is that it can take advantage of any camera supported by INDI, and there are a huge number of them. This of course means that we would not be constrained to the Starlight Xpress camera we used before – although we quickly found that abandoning that would also mean abandoning the Oculus enclosure, which is a pity as it is cleverly designed.
So, we started looking at alternative cameras, based on different cameras supported by INDI. As it happens, we have two such cameras here, made by the Chinese company ZWO. One is permanently installed on our optical telescope as an electronic finder (which makes centering faint objects really simple – I should write a blog on that!).
The other was attached to a planetary-imaging rig but, in the short-term, it was pressed into service to check-out the possibilities of using it for an All-sky camera. Usefully, ZWO supplies these cameras with a wide-angle lens. It's wide enough to check out the system but not quite enough for full horizon viewing. One thing I wanted to check is the performance with USB2. The heritage Oculus system, which has a USB 2 connection, is on top of one of the observatory masts – it's already way beyond the 5m limit for USB2 so is linked via an Icron Ranger system to extend the USB range. This is USB2 only, and a USB3 replacement is expensive.
But modern cameras like the ZWO models have USB3 connectors, so we needed to check if they also work with USB2.
It turns out that they do. Here's a frame from an ASI290MC on my desk, connected by USB2 to a Raspberry Pi running INDI-AllSky. It might look a bit odd, but that's because it's looking directly upwards at the ceiling, at night.
I measured download speed via both USB2 and USB3 and found they were the same! Furthermore, the speed was about 90 Mbps for both (the USB2 limit is 400 Mbps), so clearly the internal electronics is working at USB2 speeds only.
Next we need to select the camera and lens combination, which will be in the next blog.
#caméra, #all-sky, #tout-ciel, #Starlight_Xpress_Oculus

Sans titre
Temporary closure
Temporary closure due to an electronic problem on the main telescope used for visits. We are waiting for parts to repair it.
image
Moon and Darkness Calendar
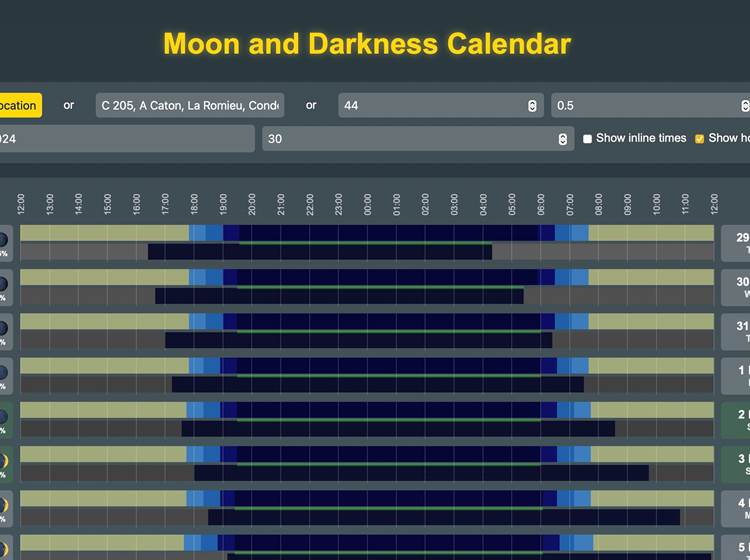
We have discovered an extremely useful on-line resource which gives a good estimate of the darkness which can be expected on any night of the year, based on sunset, sunrise and twilight, as well as the Moon phase and when it rises and sets. More information is given in the ""Help and Details"" section below the calendar.
You can use it for any location, but in planning a visit to GersAstronomie you will need to enter our geographical location: 44 degrees latitude and 0.5 degrees longitude. Then enter any starting date you want and the number of days you want the calendar for.
The URL for ""Moon and Darkness Calendar"":
https://dersphere.github.io/moon-and-darkness-calendar/
Aurora Borealis visible at Bourdieu in the south of France?
This year, 2024, we have seen the aurora borealis (or "northern lights") at Le Bourdieu a couple of times. This is pretty unusual. They are caused when energetic particles and plasma, known as a coronal mass ejection, are launched from the Sun by a violent event called a flare, and intercept the Earth.
The Sun has a regular cycle of activity, with a period of about 11 years. This is most obviously visible in the number of sunspots on its face – we can safely observe sunspots and the arcing prominences (which look like flames at the edge of the Sun) with the solar telescope in our main observatory. At the minimum of the solar cycle there are rarely any visible, but now, at solar maximum, they are plentiful.
Early on 9 October 2024 there was a large flare, classified as X1.8 which was perfectly placed to launch a coronal mass ejection straight at Earth!
Sure enough, in the evening of 10 October we were alerted by friends spread over northern Europe that an auroral display was in progress. We had missed the superb aurora of 10 May 2024 (though our observatory all-sky camera recorded it in black and white), so were anxious to see this one.
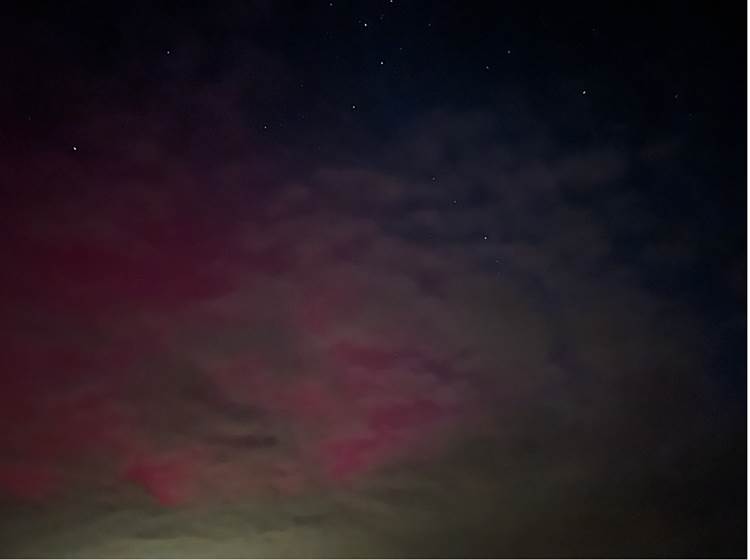
It wasn't very promising: there was cloud to the north as well as moonlight. There was nothing visible to the eye, even after allowing time for adaptation to the dark, but we knew the iPhone camera is able to capture faint objects so tried it. Well, there is a red aurora there, peeping through cloud, but it's not very impressive.
The most common auroral colour is green, which is caused by charged particles colliding with oxygen molecules between 100 and 300 km above the surface. Green auroras are often seen in combination with red ones above them, which are caused by charged particles interacting with free oxygen atoms higher up, at 300 to 400 km.
So, this red aurora is the upper part of a display which would be green lower down, but below our horizon here, so far south.
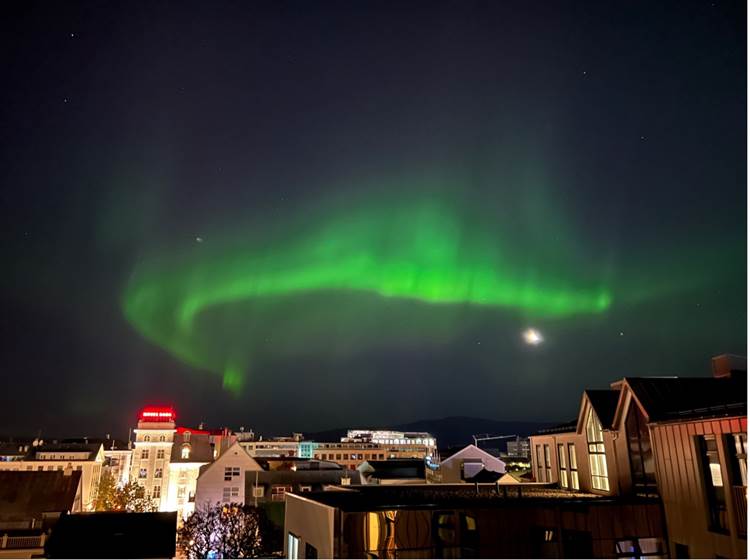
The eye is much more sensitive to green and, just a few weeks before, we could see this in dramatic fashion. At the end of September we were at a scientific meeting in Reykjavik, Iceland, where aurora are visible practically every clear night. Sure enough, we could see them from the hotel's roof terrace in downtown Reykjavik, easily visible to the unaided eye (even with a bright Moon) and dancing around. No special solar activity was needed this time: Iceland is sufficiently far north that auroras are visible most nights.
There's no red visible in this example, but other pictures we took do show red traces, and others at the meeting, who had ventured out of town, saw the red component too.
The Sun will remain active, at its maximum of the current solar for many months yet, so we have great hopes of seeing more auroras at Le Bourdieu !
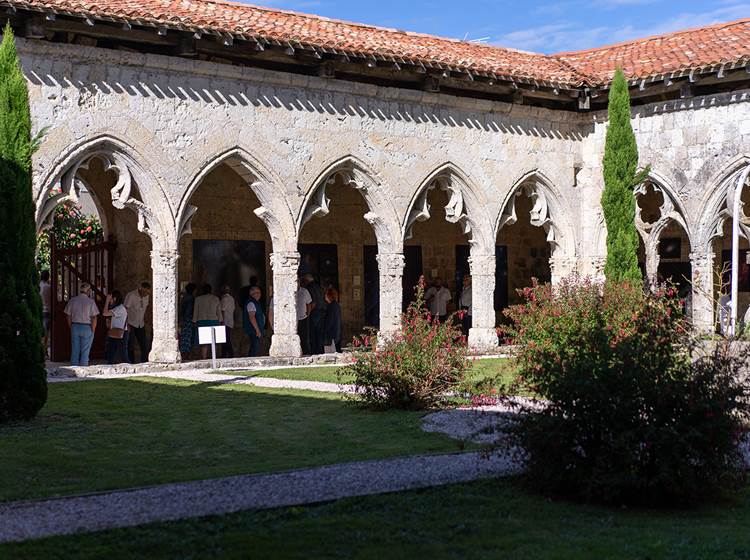
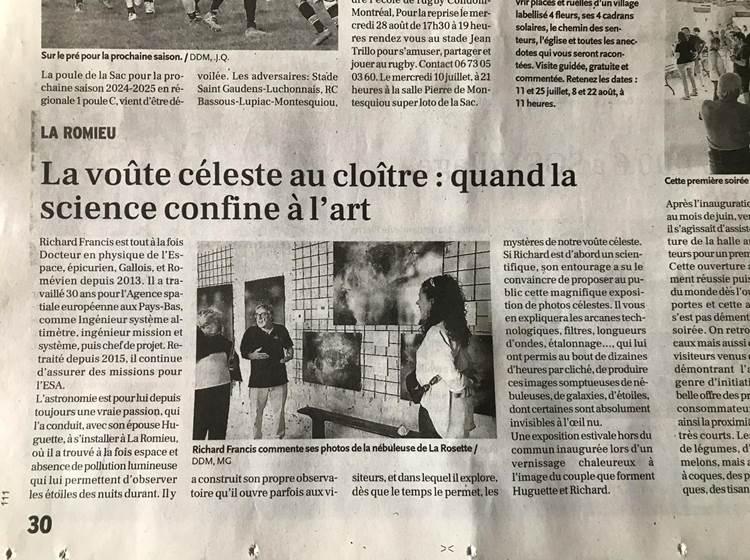
The Opening of EXPO 2024 “The Skies of La Romieu” at the Collegiate Church of La Romieu
For several years, Richard has been taking photographs of nebulae, galaxies, stars, deep space objects a few hundred light years away with his state-of-the-art telescopes and cameras.
Finally, he gave in to the request of friends; the summer exhibition of some of his astro-photographs was inaugurated on July 3, 2024 during a warm opening at La Collégiale de La Romieu, one of the most beautiful villages in France. The exhibition of 33 celestial photos, all taken at Le Bourdieu observatory, ends on October 1. But this is only the beginning.


